
Key takeaways
- A defect that moves from shot to shot usually comes from the process or the resin. One that appears in the same place every shot is usually built into the mold or the part design.
- Fix the cheapest cause first: settings and resin drying, then the mold, then the part design.
- Even walls, thin ribs, draft, rounded corners and a well-placed gate prevent most defects before tooling.
- Agree visible faces and limit samples early, so 'good' and 'bad' mean the same thing to both teams.
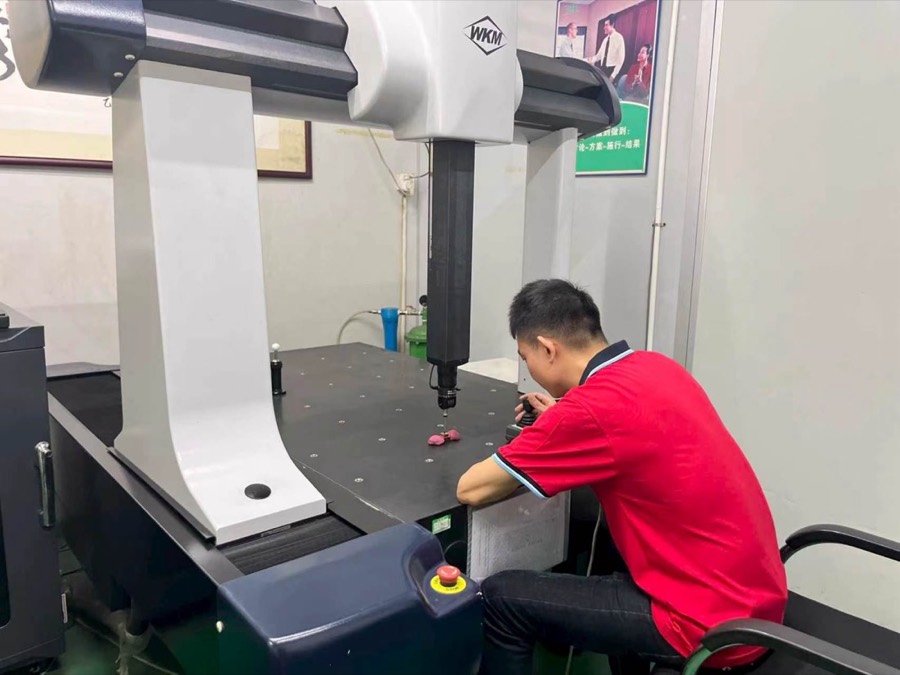
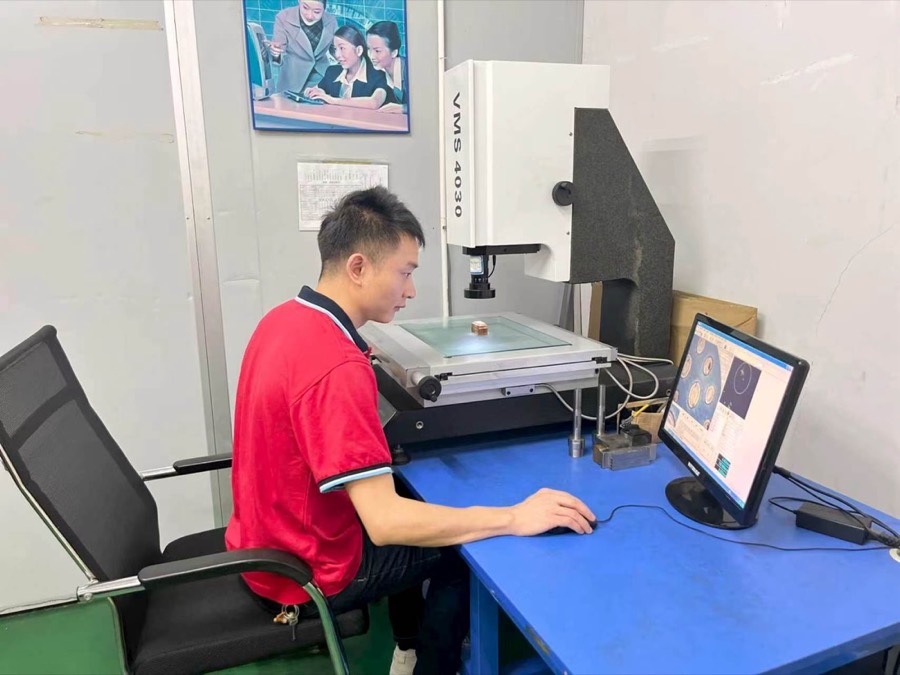
- ACKOR checks parts on two WKM CMMs and a VMS 4030 vision system, with FAI and CPK reports where needed.
Find where the defect starts
Before changing anything, look at the pattern. Does the defect appear on every shot, in the same place? Does it appear in only one cavity of a multi-cavity mold? Does it come and go with the time of day, the resin lot or the machine? The answers point to the cause.
Part design
Uneven walls, thick ribs, sharp corners and too little draft cause sink marks, warpage and sticking. These are cheapest to fix before the steel is cut.
Mold
Gate size and position, vents, cooling channels and the fit of the shut-off surfaces cause defects that repeat every shot in the same place.
Process and resin
Temperatures, speed, pressure, hold time and resin drying cause defects that change with the settings or the material lot.
The order of fixes matters. Process settings cost nothing to change. Mold changes cost time and money. Part design changes after tooling cost the most, because they can mean new steel. Start with the process, move to the mold when the defect stays in the same place regardless of settings, and change the design only when the first two cannot solve it.
Ten common defects at a glance
Use this table to start the conversation with your molder. The first fix listed is where most teams begin; the right answer still depends on your part, resin and mold.
| Defect | What you see | Usual mold cause | Usual process cause | First fix to try |
|---|---|---|---|---|
| Short shot | Part not fully filled; an edge or rib is missing. | Blocked or shallow vents; gate or runner too small. | Melt too cold; speed, pressure or shot size too low. | Check shot size and vents, then raise speed or pressure. |
| Flash | Thin fin of plastic at the parting line or around pins. | Worn or poorly fitted parting surfaces; vents too deep. | Pressure too high; melt too hot; clamp force too low. | Lower pressure; refit shut-offs if it returns. |
| Sink marks | Shallow dents over thick walls, ribs or bosses. | Gate freezes early; weak cooling at thick zones. | Hold pressure or hold time too low. | Extend hold time; core out thick sections. |
| Warpage | Part bends or twists after ejection. | Uneven cooling between mold halves. | Ejected too hot; mold temperatures unbalanced. | Balance cooling; keep walls even. |
| Weld lines | Visible line where two flow fronts meet. | Gate position; no vent at the meeting point. | Melt or mold too cold; slow fill. | Add a vent there or move the gate. |
| Flow marks | Wavy lines or rings near the gate. | Gate too small; mold surface too cold. | Injection speed or melt temperature too low. | Raise mold temperature and speed in steps. |
| Burn marks | Brown or black spots at the end of fill. | Trapped air with no vent. | Injection too fast at end of fill. | Add vents; slow the last stage of filling. |
| Jetting | Snake-like streak starting at the gate. | Gate shoots into open space. | Injection too fast at the gate. | Gate against a wall; start filling slower. |
| Silver streaks | Silver lines pointing away from the gate. | Rarely the mold; sometimes a cold, wet surface. | Resin not dried; melt held too hot too long. | Dry resin to the datasheet; check barrel time. |
| Voids | Bubbles inside thick sections. | Gate too small to pack thick areas. | Hold pressure too low; wet resin. | Increase hold pressure; reduce thick sections. |
Filling defects: short shots, flash and burn marks
Short shots
A short shot is a part that is not completely filled. The plastic froze before it reached the end of the cavity, or air trapped in the cavity had nowhere to go. Thin walls far from the gate, long flow paths and blocked vents make short shots more likely. On the process side, low melt temperature, slow injection and a shot size that is too small are the usual suspects.
Start by checking that the shot size and cushion are correct, then raise injection speed or pressure in small steps. If the short shot is always in the same corner, look at the venting there. If the wall is simply too thin for the flow length, the part design or gate position may need to change.
Flash
Flash is the opposite problem: plastic escapes where it should not, usually at the parting line, around ejector pins or at slide shut-offs. It happens when the injection pressure overcomes the clamp force, or when the steel surfaces that should seal no longer meet perfectly. Lowering pressure or melt temperature can stop flash quickly, but if the shut-offs are worn, the fix belongs in the toolroom.
Burn marks
Burn marks are dark spots, usually at the last point to fill. Air trapped there is compressed so quickly that it heats up and scorches the plastic. More venting at that point is the lasting fix; slowing the final stage of injection helps in the meantime. Burn marks that appear gradually over a production run often mean vents are filling with residue and need cleaning.
Shrinkage defects: sink marks, voids and warpage
All plastics shrink as they cool. Defects appear when some areas shrink more, or later, than others.
Sink marks and voids
A thick section keeps shrinking after the surface has set. If the surface is still soft, it is pulled inward and a sink mark appears. If the skin is already rigid, the shrinkage happens inside instead, and a void forms. Both have the same root cause: too much material in one place. Higher hold pressure and longer hold time help, but only while the gate is still open. The lasting fix is to core out thick areas and keep ribs thinner than the wall they join.
Warpage
Warpage happens when one side of a part shrinks more than the other. Uneven wall thickness, uneven mold temperature and fiber orientation in glass-filled resins are the main causes. Ejecting parts too hot makes it worse. Balanced cooling in both mold halves and even walls in the part design prevent most warpage. Sometimes the gate position is changed so that flow, and therefore fiber orientation, runs in a more favorable direction.
Surface defects: weld lines, flow marks, jetting and silver streaks
Weld lines
Where two flow fronts meet, around a hole or from two gates, they may not fuse perfectly and leave a visible line. Weld lines can also be weaker than the rest of the part. Higher melt and mold temperatures, faster filling and a vent at the meeting point all help. Moving the gate can move the line to a place where it is not seen and not loaded.
Flow marks and jetting
Flow marks are waves or rings near the gate, caused by plastic cooling unevenly as it flows over a cold mold surface. Jetting is a snake-like streak that forms when plastic shoots through a small gate into open space instead of spreading against a wall. Warmer molds and controlled injection speed reduce flow marks; for jetting, the best fix is a gate that directs the flow against a wall or core.
Silver streaks (splay)
Silver streaks are almost always a material problem. Moisture in the resin turns to steam in the barrel and leaves streaks on the surface. Resins such as PC, PA, PET and ABS absorb moisture from the air and must be dried to the supplier's datasheet before molding. Streaks can also come from resin held too long at high temperature, so barrel size and residence time matter too.
Visible faces need a written standard
Weld lines and flow marks may be acceptable on a hidden face and unacceptable on a front cover. Mark visible faces on the drawing and agree limit samples before the T1 trial.
Which defects matter most for your product
Every defect is unwelcome, but each type of product has a few that matter most. Knowing them helps you focus the acceptance standard on what really affects your customer.
Cosmetic packaging
Caps, jars and lipstick parts are judged by eye. Flow marks, weld lines, gate marks and scratches on the visible face matter most, along with the fit and feel of threads and closures.
Automotive lamp lenses
Clear parts show every flaw. Silver streaks, bubbles, flow lines and surface marks affect light output and appearance, so drying and mold polish are critical.
Electronics and home housings
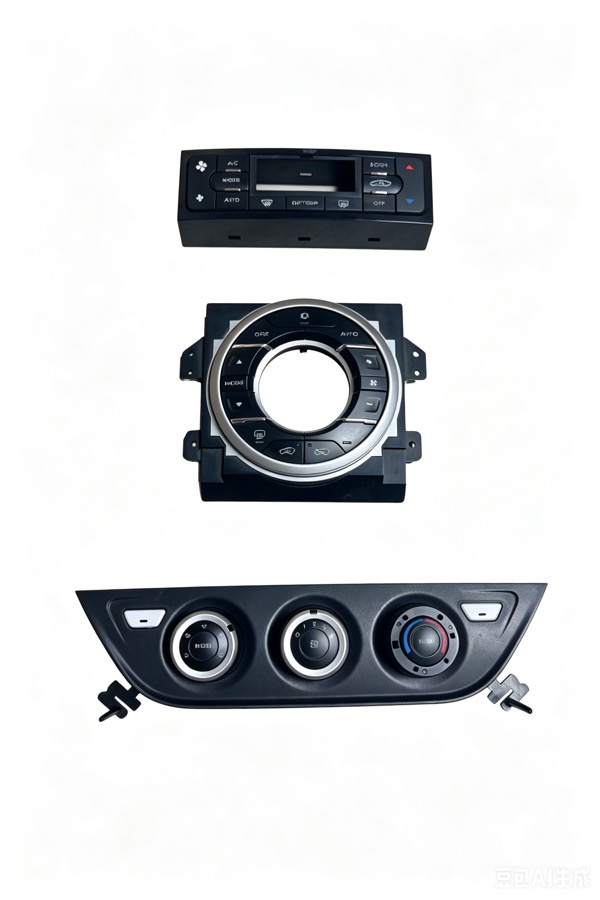
Sink marks over bosses, warpage of large flat faces and poor fit between two halves are the common complaints. Snap fits must hold without cracking.
Medical device parts
Dimensions and consistency across cavities come first, because the parts must fit devices and accessories reliably. Short shots and flash at small features need close control.
Our business covers all four areas: cosmetic packaging (about 30 percent), 3C and home products (30 percent), automotive (20 percent) and medical (20 percent). When you send a drawing, tell us how the part will be used and seen, and we will plan the trial and inspection around the defects that matter for it.
Mold problem or process problem? A quick test
When a defect appears, a few questions usually separate mold causes from process causes:
- Is it in the same place every shot?If yes, look at the mold: gate, vents, cooling or shut-offs.
- Is it in one cavity only?Then it is almost certainly the mold, because the settings apply to all cavities.
- Does it change when you change settings?If a small change in temperature or speed makes it better or worse, the process is involved.
- Did it start with a new resin lot?Check drying, grade and moisture before touching the mold.
- Did it appear gradually during a run?Vents filling with residue or a cooling circuit losing flow are common causes.
Some defects have more than one cause at once. A sink mark can come from a thick wall and a short hold time together. In that case, fix the process first to stop the immediate problem, then plan the design or mold change so the part has more margin in future. A part that only works at one exact setting will drift out of tolerance sooner or later.
Recording the answers when you report a defect saves a lot of time. A supplier who knows the defect is in cavity 3 only, on every shot, from the first hour, will go straight to the steel. A supplier who hears 'some parts are bad' has to start from the beginning.
Prevent defects in the part design
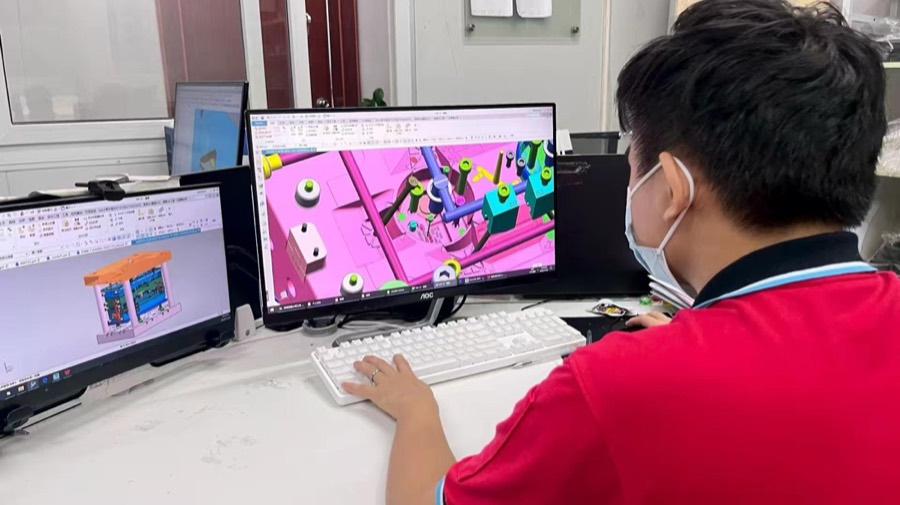
We review these points in our DFM study, drawn in NX 12 and AutoCAD, before any steel is cut. Changing a line on a drawing costs far less than changing a hardened cavity.
- Keep walls evenLarge jumps in wall thickness cool at different speeds and cause warpage and sink.
- Thin the ribsRibs thinner than the wall they join leave less mass to shrink, so the face side stays flat.
- Add draftDraft on side walls lets the part release without drag marks or white stress marks.
- Round the cornersRadii help the plastic flow and reduce stress that can crack the part later.
- Agree the gateGate position decides where weld lines and gate marks land, so it should suit the visible faces.
Material choice belongs here too. A resin with high shrinkage, or one that absorbs moisture, needs more care in design and processing. If you are still choosing a resin, tell us the use environment and the appearance you need, and we will point out the defect risks of each option.
Prevent defects in the mold
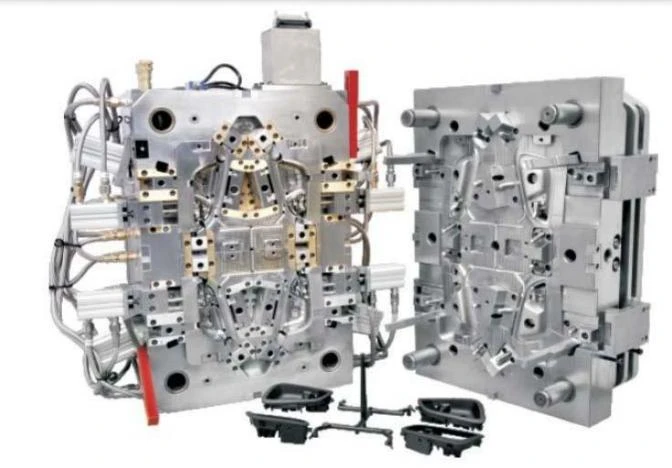
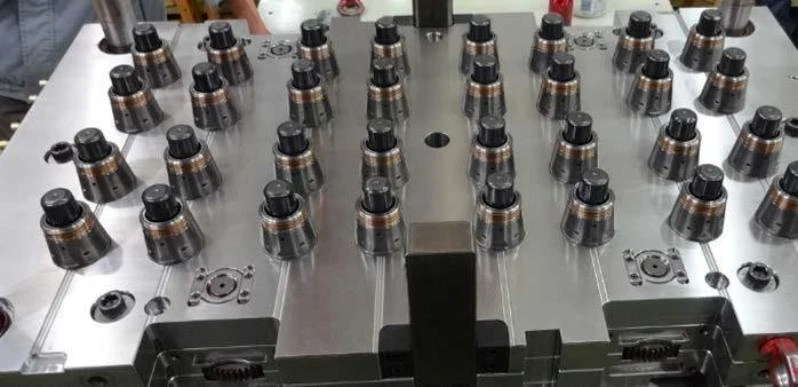
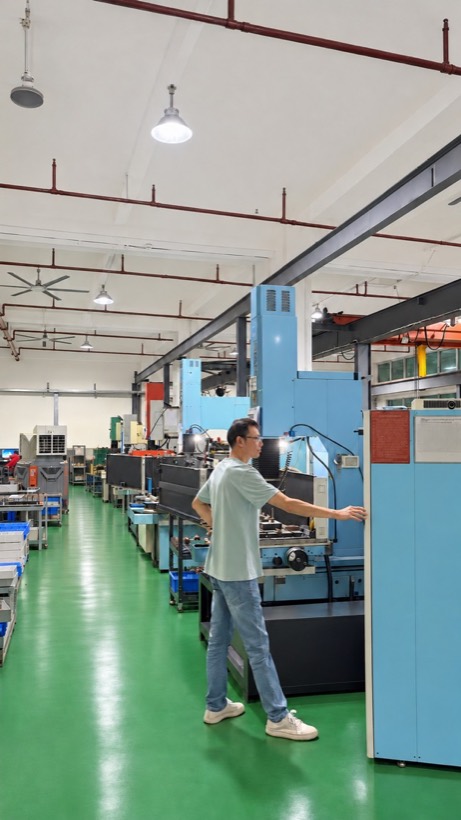
A defect that repeats every shot is usually designed out in the steel. Our toolroom machines cavities on a GF Mikron VCE 800 Pro, a 5-axis center and 5 CNC machines, with 6 EDM machines and 2 Seibu wire-cut machines for fine details and vents. Mold parts are machined to ±0.01 mm, so shut-offs fit tightly and flash is less likely from the start.
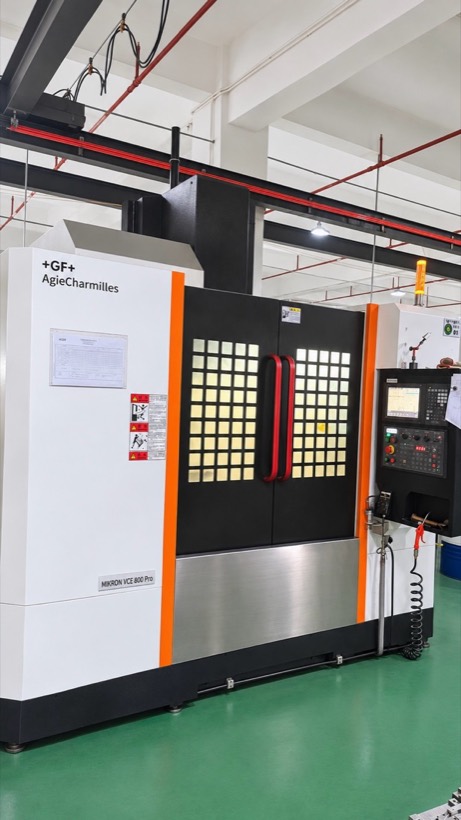
Steel choice matters too. Polished cosmetic faces are usually cut in S136 or NAK80; glass-filled resins that wear steel call for harder grades such as 1.2344ESR. Good cooling design, with channels close to every cavity surface, keeps mold temperature even and prevents warpage and sink. Venting is cut at every end-of-fill point, not only where problems appear at trial.
Keep the process stable in production
A mold that made good parts at trial can still make bad parts in production if the process drifts. Stable production depends on a few habits:
- Dry the resin to the supplier's datasheet, every lot, and check it before molding.
- Record the process on a parameter sheet once the parts are approved, and start every run from it.
- Keep the mold clean, especially vents and parting surfaces.
- Check first parts at the start of every run against the approved sample.
- Watch the cushion and cycle time: changes are early signs that something has shifted.
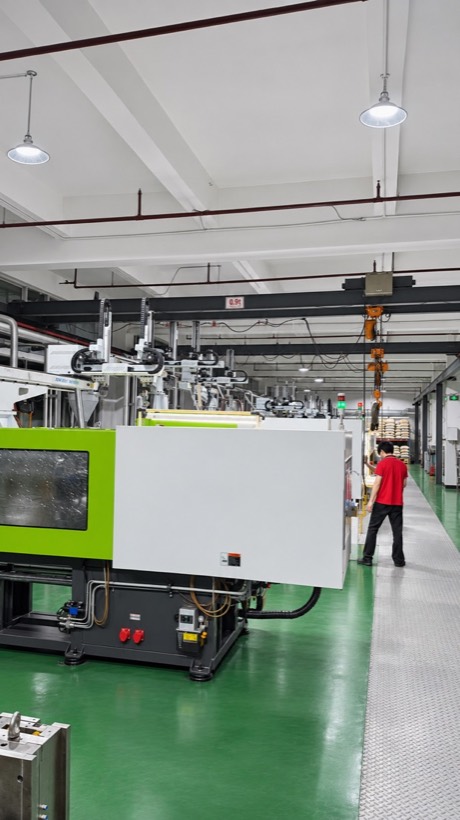
We run trials and production on our own 15 Yizumi presses, so the process approved at trial is the one used in production. The molding process parameter sheet is part of the handover package with every mold.
Catch defects before parts ship
Our company catalog lists six quality checks between the first electrode and approved parts. Each one is a point where a defect can be stopped before it reaches the next stage.
- Electrode inspectionEDM electrodes are measured before they burn the cavity.
- Part inspectionMachined mold parts are checked against the mold drawing.
- Mold assembly checkFit, shut-offs, venting and cooling are checked when the mold is assembled.
- First article inspectionT1 parts are measured against your 2D drawing and FAI report.
- CPKWhere the project needs it, process capability is measured on the critical dimensions.
- Trial validationParts are approved before the mold moves to production.
Parts are measured on two WKM CMMs and a VMS 4030 vision system. The factory holds ISO 9001:2015 certificate No. 24CN34511981Q, valid to 2027-10-29.
When you find a defect, send these six items
A photo alone rarely shows whether the problem is the mold, the settings or the resin. These details shorten the back-and-forth:
Photos with cavity number
Show the defect and the cavity number molded into the part.
Lot or date code
So the parts can be matched to the day and machine they were molded on.
Drawing revision
The exact revision the parts are being judged against.
How many are affected
One cavity, every cavity, or only some lots.
Assembly impact
Whether the parts still fit and work, or only look wrong.
Your acceptance standard
Limit samples or cosmetic rules your team uses.
With those details, we can usually tell within one reply whether the cause is in the mold, the process or the material, and what the fix will be. Read our guides to molded part inspection and mold trial and validation for how acceptance is agreed.
Frequently asked questions
What are the most common injection molding defects?
The defects buyers report most are short shots, flash, sink marks, warpage, weld lines, flow marks, burn marks, jetting, silver streaks (splay) and voids. Each one points to a different cause in the part design, the mold or the process settings.
What causes sink marks on injection molded parts?
Sink marks form where a thick section keeps shrinking after the surface has set. Typical causes are thick walls or heavy ribs, a gate that freezes too early, and hold pressure or hold time that is too low. Coring out thick areas is the most lasting fix.
Can a molding defect be fixed with process settings, or does the mold need to change?
Start with the process, because settings are cheap to change: temperature, speed, pressure, hold time and resin drying. If the defect stays in the same place on every shot, the cause is usually in the steel, such as a missing vent, a gate in the wrong place or uneven cooling.
Why does a defect appear in only one cavity?
Because process settings apply to all cavities at once, a defect in one cavity points to the mold: a blocked vent, a smaller gate, a warmer cooling circuit or a worn shut-off in that cavity.
How does ACKOR check parts for defects before they ship?
Our toolroom runs six checks from electrode inspection to trial validation. At the trial we measure parts on two WKM CMMs and a VMS 4030 vision system, then issue FAI and, where the project needs it, CPK reports.
What should I send if I find defects in delivered parts?
Send clear photos with the cavity number visible, the lot or date code, the drawing revision, how many parts are affected and whether they still assemble. That lets us tell a mold problem from a process or resin problem quickly.